By far one of the best ways to make Exp in OSRS is by slaying Greater Demons. And they are by no means a walk in the park, by following this guide, you’ll know exactly what to be on the lookout for, the ideal setup to use, what your stats should be at, and all the locations to find them.
General Stat Requirements
While not definite, you want to ideally be:
- In the 60s range in Combat
- At least between 40 and 45 levels in Prayer
What You Should Expect from Greater Demons
Despite being physically very powerful, Greater Demons are weak to every form of damage. That means, if you are someone that is specialized in Magic or Ranged, these are viable options for killing them.
Still, while this is true since they are still very powerful, I would recommend a Melee-based build, as you are more apt to have a higher defense. I will also include a Ranged setup for those that are primarily focused on that area.
Greater Demons primarily attack via Melee and have a Max Hit of 10. They have a 1/128 chance of dropping a Hard Clue, a 1/100 chance of dropping a Brimstone Key, and a 1/385 chance of dropping a Totem Piece (found in the Catacombs of Kourend). They have an average drop rate of 375 GP per kill.
Combat Setup
As mentioned above, while Greater Demons are susceptible to all forms of damage, it is recommended that you go in with a Melee setup due to having a higher defense and the ability to do more damage.
Melee Setup


Some ideal weapons to bring with you can include:
- Dragon Scimitar
- Dragon Defender
- Abyssal Whip
- Abyssal Bludgeon
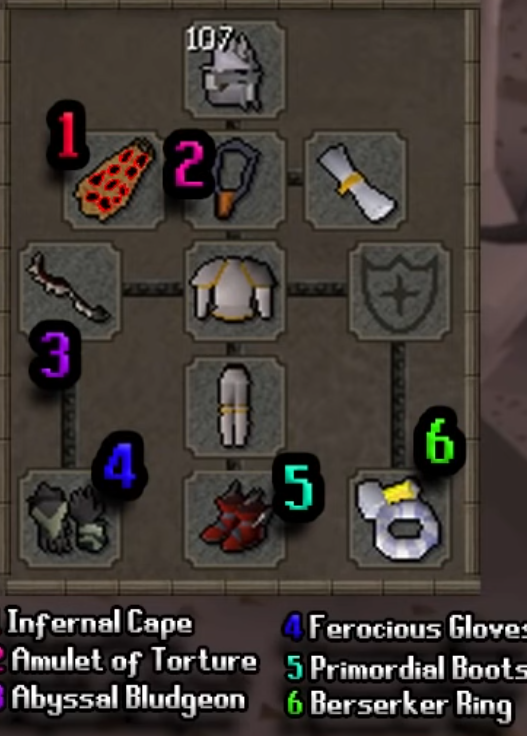
Some ideal armor and defensive gear include:
- Black Mask
- Slayer Helm
- Initiate Armour
- Proselyte Armour
- Ferocious Gloves
- Primordial Boots
Some ideal items to also bring can include:
- Ardy Cloak
- Combat Bracelet
- Rune Boots
- Fire Cape
- Amulet of Fury
- Ring of Wealth
- Amulet of Torture
Ranged Setup
Some ideal weapons to bring with you can include:
- Adamant Darts
- Mithril Darts
- Magic Shortbow
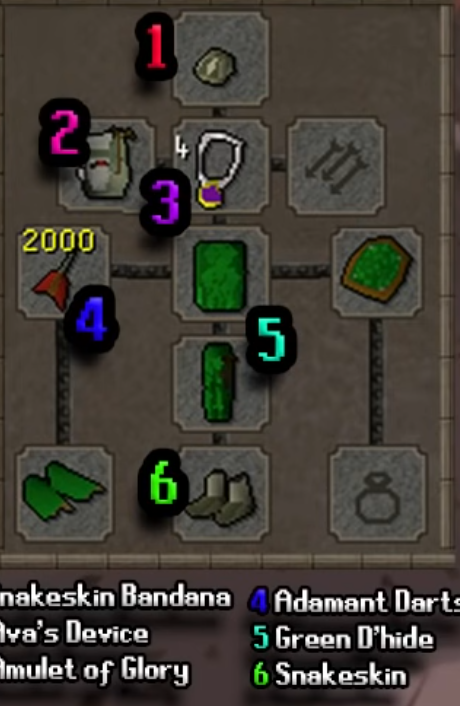
Some ideal armor and defensive gear include:
- Black Mask
- Snakeskin Bandana
- Green O’hide
- Black O’hide Armour
- Snakeskin Boots
- Barrows Gloves

Some ideal items to also bring can include:
- Ava’s Device
- Amulet of Glory
- Ava’s Accumulator
Greater Demon Location
Next up, here are several of the places Greater Demons are most commonly found. This list is broken down by the lowest level to the highest level of difficulty.
Mount Karuulm
First up is Mount Karuulm. For this area, it’s recommended that you have at least:

- 2 Super Strength Potions
- 2 Super Attack Potions
- A House Tablet
- An Herb Sack
- A Rune Pouch
- A Complete Cannon Set
- Cannonballs
- 10+ Prayer Pots or Food
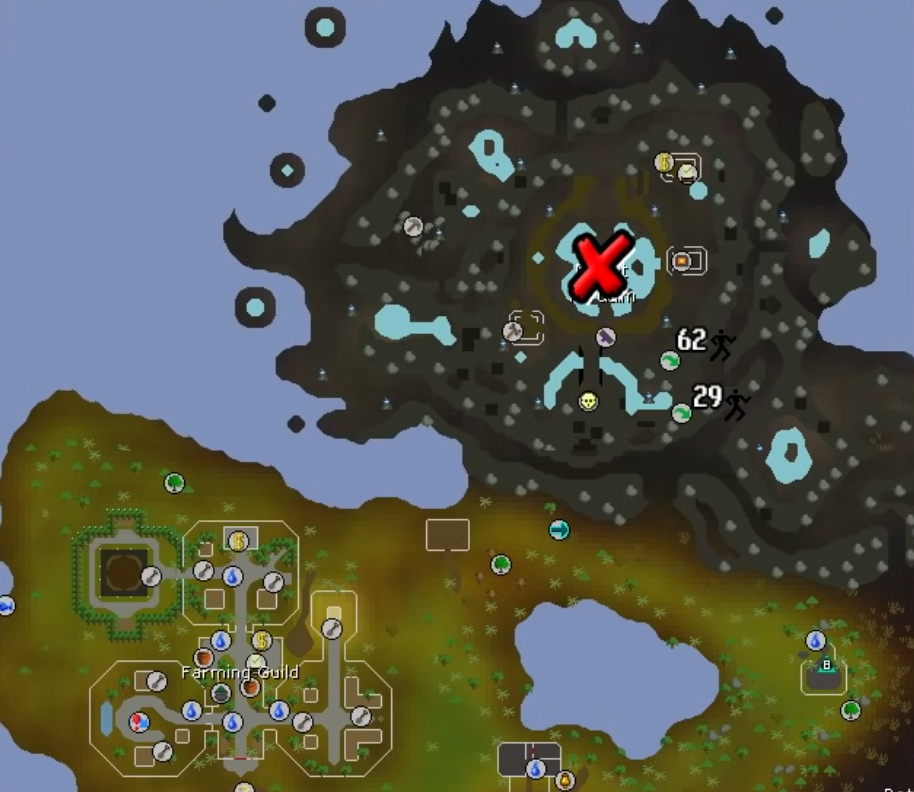
As for how to get there, the best route is with Rada’s Blessing as it essentially teleports your right to the dungeon. You can also use the Fairy’s Ring (CIR) is the second-best and puts you just south of the mountain. Finally, the third option is the Battlefront Tele. This option sends you further off than the Fairy’s Ring to the far right of the map.
Once you reach the dungeon, you’ll see an elevator that will take you into the area. You’ll need to be wearing either Granite Boots, Boots of Stone, or Boots of Brimstone.
When you get inside, head to the northern room and take the eastern path over the rock.

You’ll immediately see a set of stairs that you’ll have to climb. From there, head to the western side of the second floor. There, you will find a small nest of Greater Demons to slay.
Chasm of Fire
Next up is the Chasm of Fire. Much of the inventory will be the same. To teleport, you’ll want to ideally use the Fairy Ring (DJR) as it will put you just south of the entrance.
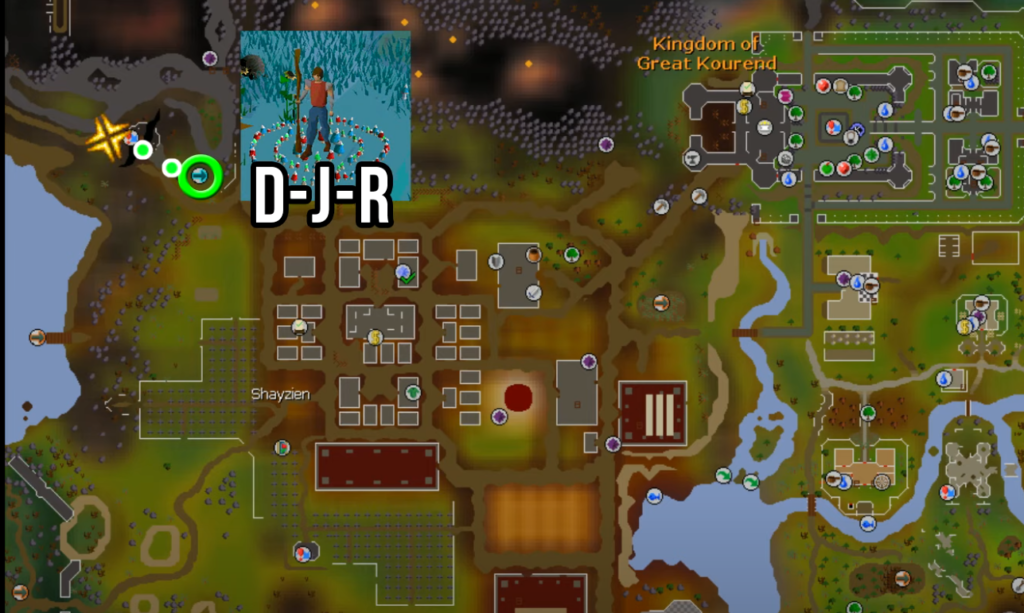
The second is the Memoirs Shayzien teleport, which puts you right at the bottom of the map. Finally, the Battlefront Tele is once again the third option. This time, it puts you almost to the other end of the map, making it the least ideal.
Much simpler than the previous area, to enter the Chasm of Fire, once teleporting and traveling to the entrance, you’ll simply cross the bridge and enter the hole. From there, you’ll head to the second floor where you will immediately be surrounded by Greater Demons.
Catacombs of Kourend
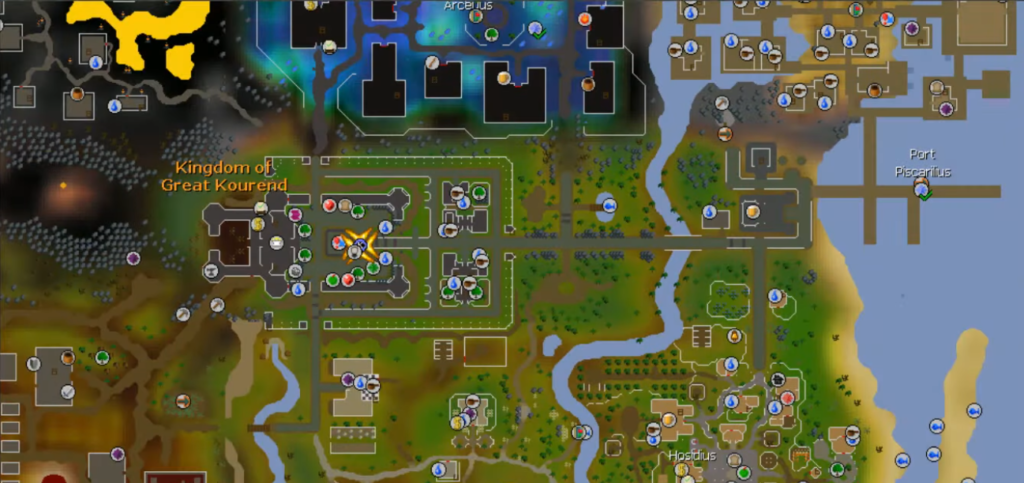
Finally, the Catacombs of Kourend is the third place to slay large groups of Greater Demons. Similar to the first two, your inventory will be virtually the same. To get there, you’ll want to ideally use the Xeric’s Heart Teleport which puts you immediately in front of the entrance. The second is the Kourend Teleport, which is only slightly further off than Xeric’s option and is considerably easier to get by comparison. The least ideal option is the Xeric’s Glade Tele, which takes you to the bottom-right of the map, making it a bit of a slog to travel.
When entering, you’ll want to investigate the statue at the center of the city. This will immediately take you into the catacombs. From there, head northeast before going east. As you continue, you’ll come into a group of Greater Demons.
Note: This is a fair bit more difficult as the space is very limited and you will be surrounded by Greater Demons. You’ll want to make sure you’ve packed enough food as well as attack and defense potions.
Conclusion
And there you have it. Killing the Greater Demons is not a particularly difficult task so long as you are properly equipped and at a reasonable combat level. Greater Demons are great for Exp as well as some potential drops, so be sure to regularly go through these areas whenever you’ve got some time.